Integrate Dockerized MSSQL Server with.NET Core 8 to Perform CRUD Operations

In this article, I’m going to show how to implement the basic CRUD operations in ASP.NET Core Web API in .NET Core 8 and also save the data in the dockerized MS SQL Server.

Conditions

Docker Desktop & SQL Server Container; Visual Studio 2019 or 2022;.NET 8
basic familiarity with the DOTNET Core Framework, Web APIs, and C#

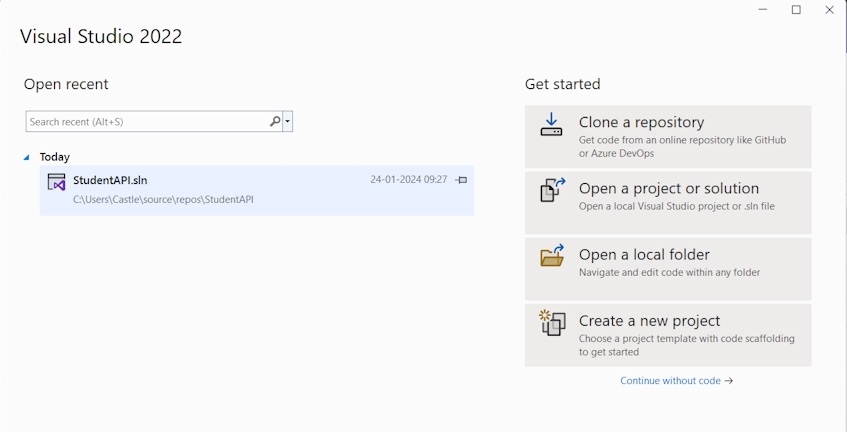
We must select “Create a new Project” in Visual Studio 2022 in order to construct a Web API application.

Then on the Project Template page, choose the “ASP.NET Core Web API”

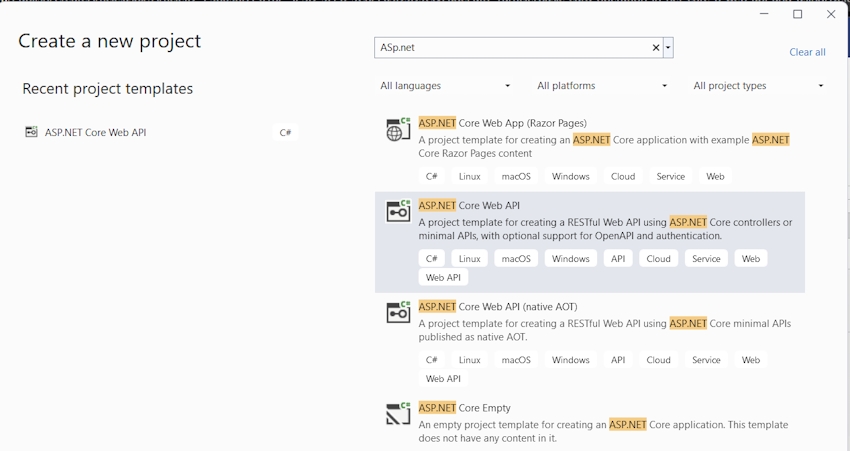
Next, select the “ASP.NET Core Web API” option from the Project Template page.

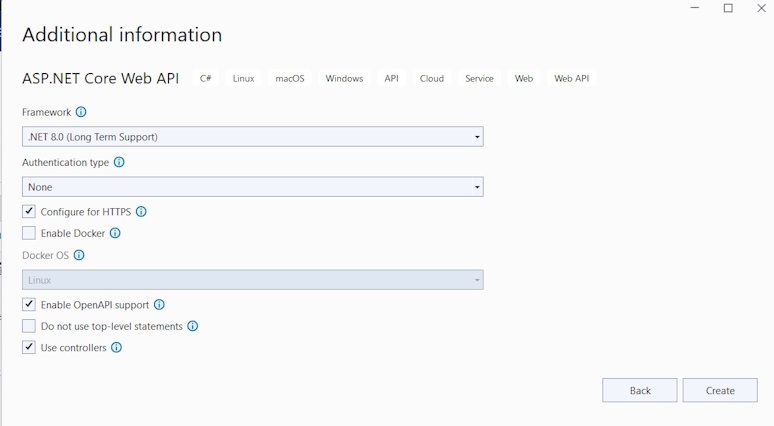
Press “Create” after selecting the Additional information exactly as it is.

Also, create the Folders & Files in the screenshot of Solution Explorer except for the migration folder which was created at the time of migration.

Also, install the necessary packages via the Package Manager console.

Student.cs

namespace StudentAPI.Models
{
    public class Student
    {
        public int Id { get; set; }
        public required string Name { get; set; }
        public required string Email { get; set; }

    }
}

DataContext.cs

using Microsoft.EntityFrameworkCore;
using StudentAPI.Models;

namespace StudentAPI.Data
{
    public class DataContext: DbContext
    {
        public DataContext(DbContextOptions<DataContext> options): base(options)
        {

        }
        public DbSet<Student> Students { get; set; }
    }
}

StudentController.cs

using Microsoft.AspNetCore.Mvc;
using Microsoft.AspNetCore.Mvc.Infrastructure;
using Microsoft.EntityFrameworkCore;
using StudentAPI.Data;
using StudentAPI.Models;
using System.Runtime.CompilerServices;

namespace StudentAPI.Controllers
{
    [ApiController]
    [Route("api/[controller]")]
    public class StudentController : ControllerBase
    {
        private readonly DataContext _context;

        public StudentController(DataContext context)
        {
            _context = context;
        }

        [HttpGet("GetAllStudents")]
        public async Task<ActionResult<List<Student>>> GetAllStudents()
        {
            var students = await _context.Students.ToListAsync();
            return Ok(students);
        }

        [HttpGet("GetStudentById/{id}")]
        public async Task<ActionResult<Student>> GetStudentById(int id)
        {
            var student = await _context.Students.Where(Student => Student.Id == id).FirstOrDefaultAsync();
            if(student == null)
            {
                return NotFound();
            }
            return Ok(student);
        }

        [HttpPost("AddStudent")]
        public async Task<ActionResult> AddStudent(Student student)
        {
            await _context.Students.AddAsync(student);
            await _context.SaveChangesAsync();
            return Ok(student);
        }

        [HttpDelete("DeleteStudent/{id}")]
        public async Task<ActionResult> DeleteStudent(int id)
        {
            var student = await _context.Students.Where(Student => Student.Id == id).FirstOrDefaultAsync();
            if(student == null)
            {
                return NotFound();
            }
            _context.Students.Remove(student);
            await _context.SaveChangesAsync();
            return Ok();
        }

        [HttpPut("UpdateStudent")]

        public async Task<ActionResult<Student>> UpdateStudent(Student updateStudent)
        {
            var dbStudent = await _context.Students.FindAsync(updateStudent.Id);
            if(dbStudent == null)
            {
                return NotFound("Student not found...");
            }
            dbStudent.Name = updateStudent.Name;
            dbStudent.Email = updateStudent.Email;

            await _context.SaveChangesAsync();

            return Ok(await _context.Students.ToListAsync());

        }
    }
}

Add the MSSQL Server Configuration line on the Program.cs.

builder.Services.AddDbContext<DataContext>(options =>
options.UseSqlServer(builder.Configuration.GetConnectionString("<ConnectionName>")));

Also, kindly add the Database connection to the appsettings.json file. Use your User ID & Password.

"ConnectionStrings": {
  "DockerDBConnection": "Data Source=localhost,1433;Database=StudentDB;User ID=sa;Password=Test@123;Connect Timeout=30;Encrypt=False;Trust Server Certificate=True;Application Intent=ReadWrite;Multi Subnet Failover=False"
}

Then you need to open the Package Manager console. Type the command to add the migration

Add-migration initial

After the successful migration, then update-database to update the scheme on the database

update-database

Now, you can able to see the Database created on the Docker SQL Server. Open the MS SQL Server Management Studio -> Login using the Docker Credentials -> Refresh -> Able to see the database on the Object Explorer

Here, I have used the MSSQL server running on the container. Make sure Docker Deamon is running. otherwise, it’ll throw an error.

Now, build & run the application. You can able to see the swagger is opened on the browser with the mentioned endpoints.

Finally, you can make the basic curd operations from the Swagger and then data will be stored in the database on the Docker Container.

You can see the data from the table and the API call returns the same. Kindly try it from your end and let me know if you are facing any issues.

Also, In my next article, I’ll show how to deploy this API application in Docker Container.

Best and Most Recommended ASP.NET Core 8 Hosting

Fortunately, there are a number of dependable and recommended web hosts available that can help you gain control of your website’s performance and improve your ASP.NET Core 8 web ranking. HostForLIFEASP.NET is highly recommended. In Europe, HostForLIFEASP.NET is the most popular option for first-time web hosts searching for an affordable plan.

Their standard price begins at only € 3.49 per month. Customers are permitted to choose quarterly and annual plans based on their preferences. HostForLIFEASP.NET guarantees “No Hidden Fees” and an industry-leading ’30 Days Cash Back’ policy. Customers who terminate their service within the first thirty days are eligible for a full refund.

By providing reseller hosting accounts, HostForLIFEASP.NET also gives its consumers the chance to generate income. You can purchase their reseller hosting account, host an unlimited number of websites on it, and even sell some of your hosting space to others. This is one of the most effective methods for making money online. They will take care of all your customers’ hosting needs, so you do not need to fret about hosting-related matters.