I’ll go over Redis in this post along with some use cases for utilizing it as our primary database.
- Overview of Redis
- Redis Datatypes
- Pros and drawbacks of Redis database use
- Redis setup in a container using the.NET 8 Web API and Redis as the primary database.
Prerequesities
- Visual Code
- .NET 8 SDK
- Redis Desktop Manager. You can download it from the URL(https://redis.io/resources/tools/)
- Docker Desktop
- Packages
- Microsoft.Extensions.Caching.stackExchangeRedis
- StackExchange.Redis
Introduction to Redis
Redis is mostly utilized for the caching layer and is an in-memory, key-value datastore. Redis’s in-memory data storage makes it possible for extremely quick read and write operations, making it ideal for low-latency data access. You may wonder why we lose data when the machine reboots when Redis saves the data in memory.
Redis offers several solutions, including append-only files (AOF) and snapshots, to address the problem of data persistence. With the help of these techniques, you can keep the data on disk permanently, guaranteeing its recovery even in the event of a system reboot.
Redis is mostly used as a cache layer, but it can also be utilized as a database to cut down on the number of calls to intricate database systems. Redis stores data as documents, primarily in JSON format, utilizing the Document Database Model.
Redis Datatypes
Redis provides a handful of data types that allow us to solve problems from caching, queuing, and event processing.
- Strings: representing a sequence of bytes
- Lists – Lists of strings
- Sets – Unordered collection of unique string
- Hashes – record types modeled as collections of field-value pairs
Pro’s of using Redis as DB
- High Performance
- Versatile DataStructure
- Low Latency
- Scalability
Con’s of using Redis as DB
- Data Durability
- Limited Query Capabilities
- Memory Constraints
Setting up Redis in a Container
Make sure that, Docker Desktop is running and open Visual Studio 2022.
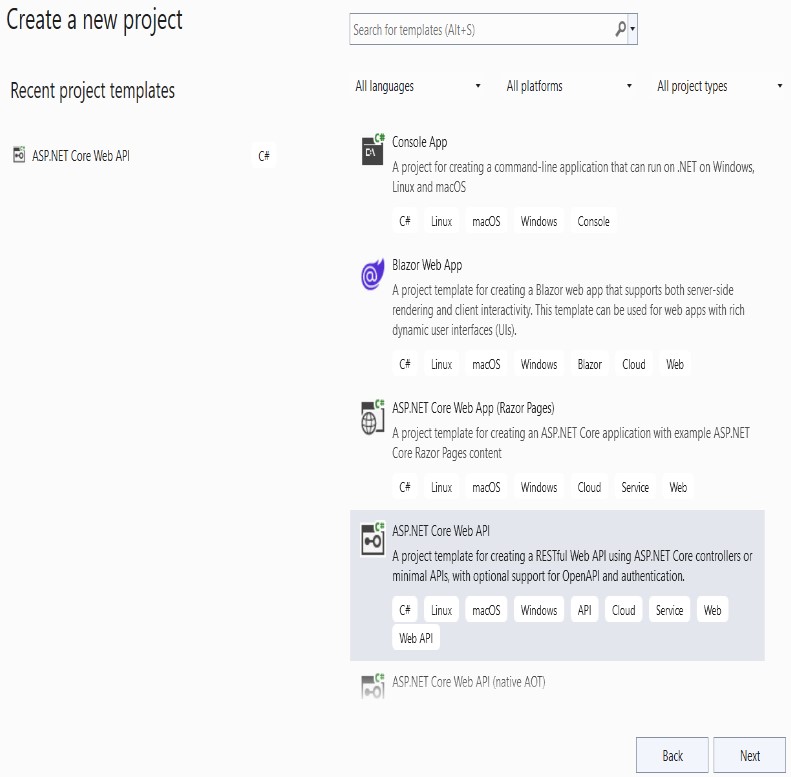
Choose “Create a New Project” –> Click the “ASP.NET Core Web API” and then click “Next”.
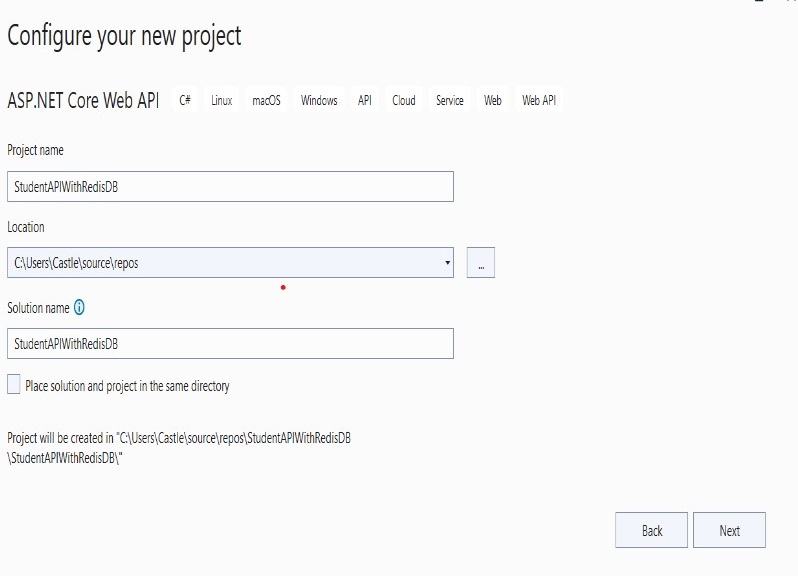
Press “next” after entering the Project name on the Configure page.
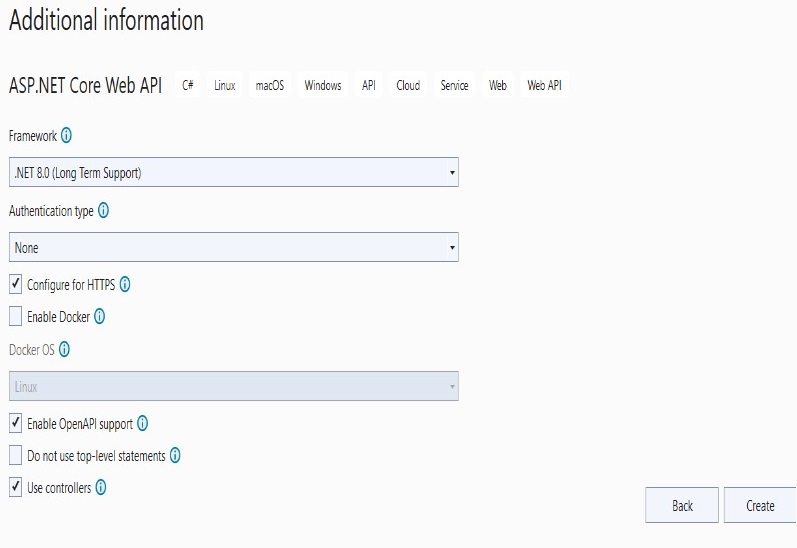
Select the information based on the screenshot on the Additional information page, then click “Create”.
Now, Create “docker-compose.yaml” file to hold the configuration for our Redis and paste the below code.
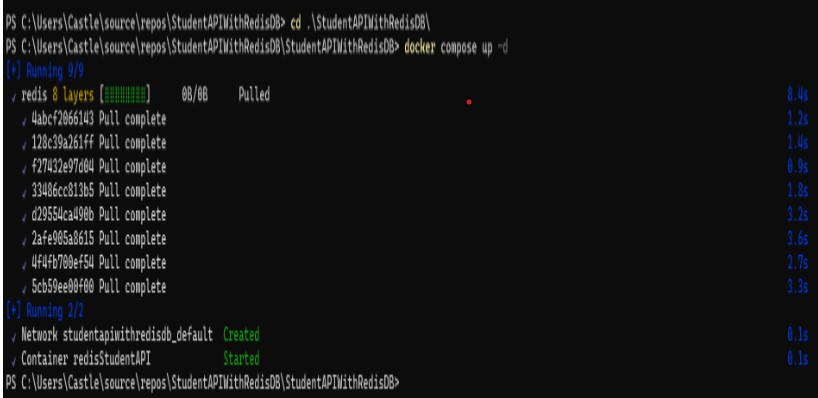
After that, open the Developer Powershell prompt from the Tools -> Command line -> Developer Powershell. Then navigate inside the Project folder and enter the command to run the YAML file “docker compose up -d”
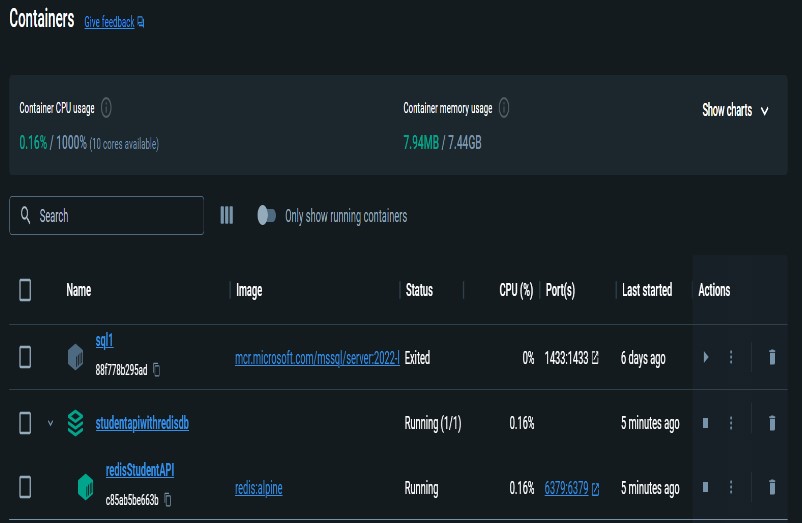
When you launch the Docker desktop and select Containers from the menu, the container that was made using the YAML file will be visible. ‘docker ps’ can also be used to view the containers that are currently operating.

To interact with the Redis Server, you need to run the below command with the container ID.
The basic setup of Docker is done and we can able to interact with Redis via the command line.
Now, we are going to see more about the string data types because we are going to store the key, and value pair as strings
Strings
It’s the simplest type of value to be associated with a key and a one-to-one mapping between key & value.
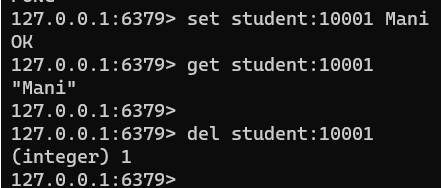
We can set the value using the Set<key> <value> and also get the using GET <key>
You can also delete the key using the Del <key>
Now, you need to install the necessary packages from the NuGet Package Manager.
Add the configuration in the Program.cs files
Programs.cs
Create a Models Folder and Create a file for our Model Student.cs then paste the code.
Student.cs
Then copy and Paste the below code on the Respection files.
StudentRepository.cs
StudentRepository.cs is the implementation of the IStudentRespository.cs interface and all its methods.
StudentsController.cs
Now, run the application you can able to see the endpoints showing on the browser using Swagger.
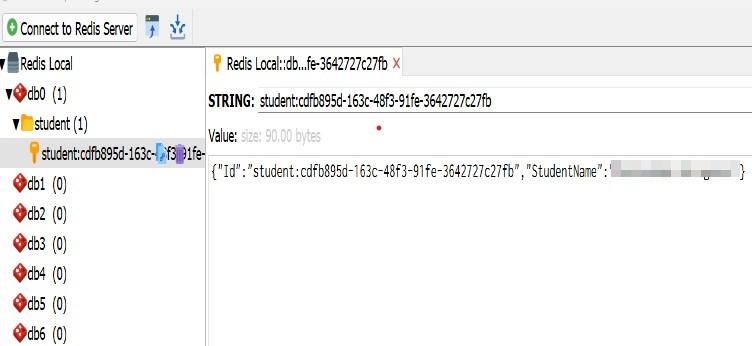
Also, it would help if you opened the Redis Desktop Manager to see the data. Initially, it’ll have 16 databases without any data.
Once, you hit the create endpoint it’ll automatically create a record in the DB0.
CREATE
For easy testing purposes, I have used the Postman to test the endpoints.
Pass the name only, then it’ll automatically create an ID with the name of the student and the suffix with the new Guid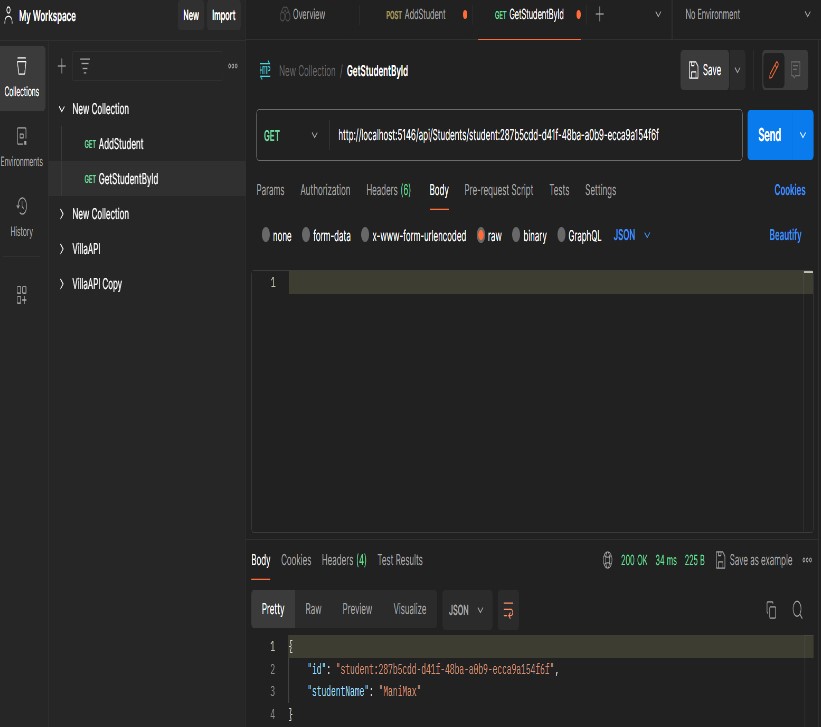
And the document is created on the DB0.
GetStudentById
For this, you need to copy the ID from the document. Then pass it on the request URL and it returns the value based on the ID.
GetAllStudents
It returns all the documents available in the Database.
Update
You need to pass the ID and the updated value. So that, it’ll update based on the ID.
Once, you refresh the manager then you’ll see the updated value.
Delete
For deleting a user, kindly pass the ID, then it’ll remove the document from the Student DB.
And the document is deleted from the file.
Previously, I had the two documents on the Student’s table but now the first one is deleted.
That’ll this is a simple way of showing the usage of Redis as a Database in our application. Here, we have reduced the Cache and stored the data directly to the Redis and also retrieved and made changes to it. Likewise, you can also apply the same to your application.
Best and Most Recommended ASP.NET Core 8 Hosting
Fortunately, there are a number of dependable and recommended web hosts available that can help you gain control of your website’s performance and improve your ASP.NET Core 8 web ranking. HostForLIFEASP.NET is highly recommended. In Europe, HostForLIFEASP.NET is the most popular option for first-time web hosts searching for an affordable plan.
Their standard price begins at only € 3.49 per month. Customers are permitted to choose quarterly and annual plans based on their preferences. HostForLIFEASP.NET guarantees “No Hidden Fees” and an industry-leading ’30 Days Cash Back’ policy. Customers who terminate their service within the first thirty days are eligible for a full refund.
By providing reseller hosting accounts, HostForLIFEASP.NET also gives its consumers the chance to generate income. You can purchase their reseller hosting account, host an unlimited number of websites on it, and even sell some of your hosting space to others. This is one of the most effective methods for making money online. They will take care of all your customers’ hosting needs, so you do not need to fret about hosting-related matters.